
- 9" x 12" drawing paper
- 9" x 6" drawing paper
- markers or colored pencils
- rulers
- pencils
- gluestick
- coffee mug tracer (optional)
1. With your 9" x 12" paper laying vertically, slide your ruler to the bottom and make a dash at the 2" and 7". (I apologize for my dashes not being large in the picture. I realized when I was uploaded these I should have made them large for blogging sake, but I kept them small because I was taking the pictures as I was making my actual exemplar.)

2. Slide your ruler about half way up and make a mark again at the 2" and 7".

3. Either turning your paper, or keeping your paper straight up and down, whichever is easiest for you, connect the dashes to make (2) 6" parallel lines.
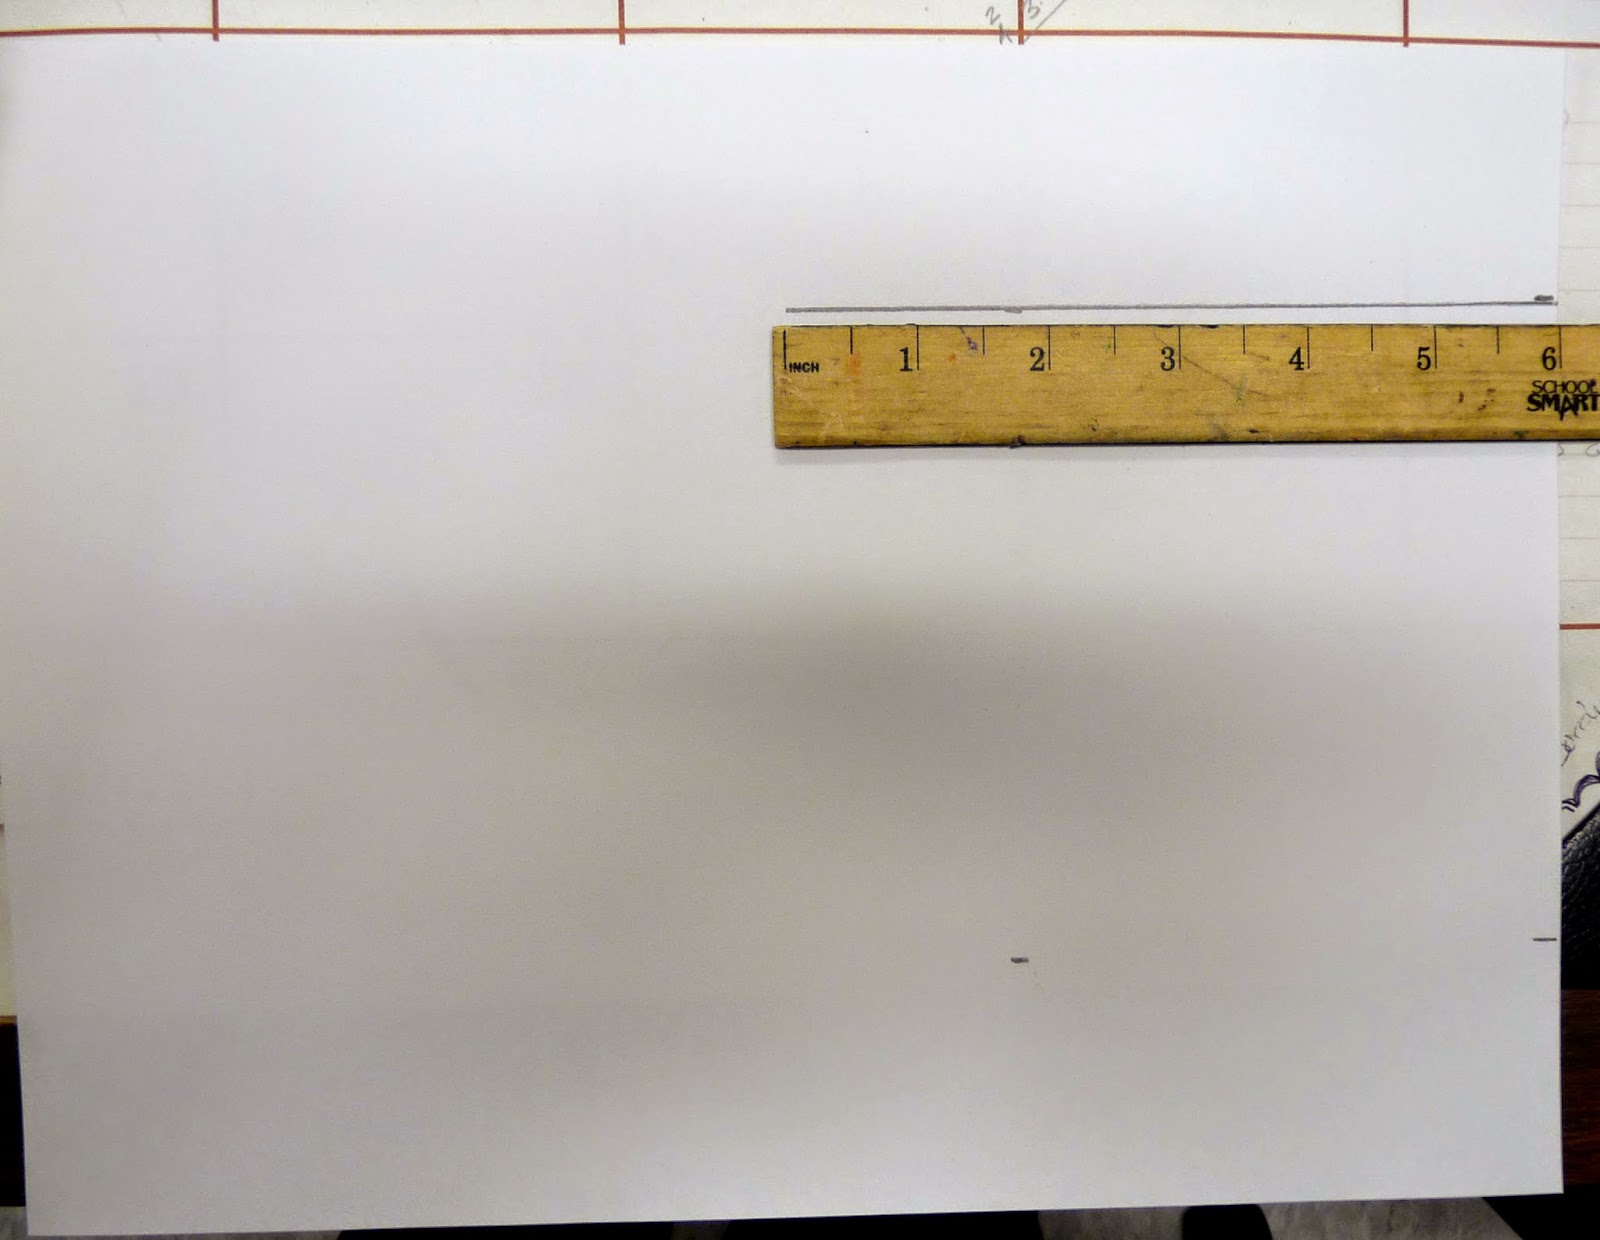
After you make each line, make a dash at the 3".
4. Connect the two lines with an arc.

5. This is your background paper. The thing you just drew- that's the inside of your mug, so you won't have to color it in completely because it will eventually be covered up.
6. When the background is finished, trace the coffee mug tracer onto the 6" x 9". I went ahead and made this tracer for the students, but you can easily teach them how to measure this for themselves. The margins are 3" wide, and then they make an arc dipping below.

7. On the bottom of their paper, make a mark at the 3" and 6".

8. Those marks get connected to the corners above, where the straight horizontal line meets the arc- like on my tracer in step 6. Those two lines will also need to be marked at 3".
This is the outside of your coffee mug. Only the center needs to be designed. The outside margins are tabs.
9. When everything is colored in beautifully, on the coffee mug paper, you will cut along the two vertical lines, starting from the top (where the arc is) and STOP at the 3" mark you made. Fold the paper towards you along the rest of the line.
10. On the background paper, you will cut along the vertical lines of your coffee mug starting from the bottom and STOP at the 3" mark.
11. Like a slot sculpture, the coffee mug paper slides into the background paper.
12. Glue tabs down.


No comments:
Post a Comment